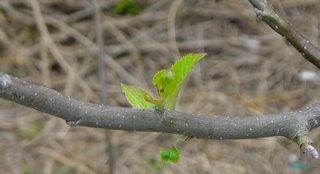
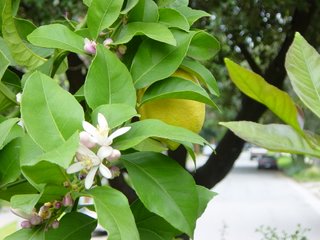
 The past several weeks have seen multiple warm / rain / warm cycles around Pasadena, with cooler daytime temps this Spring than usual. The apple trees, as a result, have barely begun to show leaf buds (below) , and the fig -- usually well foliaged by this time of year -- has only a few smallish leaves near the branch ends. Leslie's struggling lime out front has set fruit, but we will see if this, it's third year, is the year we get to eat some. The lemon, of course, just keeps on chugging. A full tree of fruit is now decorated with a full tree of fragrant white flowers. (Below, left.)
Loquats are quite large this year, perhaps because we pruned the tree back sharply over the winter. We still don't know really what to do with this high-in-vitamin-C fruit; according to greenlagirl you can munch it like a snack. We aren't so sold on them around here.
The cool spring means we still have mandarin oranges on the tree, but this week will pick the
 last of them as they have begun to go a tiny bit woody and lose flavor. Just discussed making a marmalade of the remainder, and that may be in the works for the end of the week.
Meanwhile, current crops in the ground:
Romaine Lettuce -- two varieties, heading up nicely now. Will have to learn the hard way this year when they have reached max growth without having bolted; hot weather could set in at any moment and start 'em off, but I have learned the only way to know is experience: harvesting the wrong way or at the wrong time and learning what not to do.
Sugar Peas -- Up an inch or two, ready to spiral up the tomato cages in one pot; the second pot is not planted as I have managed to lose the seeds!
Garlic -- A few small cloves perkin' along; one bulb left from the fall planting which is huge and still growing.
Broccoli -- Allowed to go to flower; dozens of small heads are available for cutting, and will go into my dinner pot tonight. The pretty yellow flowers attract heavy bee coverage, all fat and happy from the broccoli flower feed.
Yellow Onions -- several rows of yellow onion sets, and a row or two of sets in between other rows. The "in-betweeners" will get pulled as green onions for salads, can't wait to see if we can hold off long enough to get some big yellows.
Yellow Squash -- Sprouted and transplanted along the fence line.
Zucchini -- Likewise, sprouts in the ground, waiting to take over the garden.
 Cucumbers -- In the ground as seeds, just poking up. These are pickling cucumbers, which are tough but edible in salads etc. still, my secret intent is to be trying some pickles this fall. We have a big crock, and as soon as I can find a good lid and a brine recipe, off they go.
Bush Beans -- Also in the ground with a few seed-leaves showing. Three varieties all mixed up, a green, white and purple(!) variety all intermixed.
Basil -- Poor anemic looking little sprouts transplanted outside, probably too early, but they were not doing well in the containers indoors. Cross your fingers.
Pumpkins -- Carving and Pie Sugar Pumpkins in the ground and just breaking earth. Last year's pumpkins never set fruit, although they flowered large. Our next door neighbor from a big family farm in Mexico, keeps telling us how good the flowers are to eat. I felt bad that the flowers never fruited, and never got eaten either. Hopefully, we will have enough fruit set that we can trim some flowers and have those for lunch one day.
Watermelons -- Icebox sized watermelons, with weird colored flesh (yellow, pink and something else). Planted in the Cursed Planter, still not up yet.
Sunflowers -- Decorative mini flowers mixed with large full sized flowers along the side of the house out front; can be eaten, I overcooked the last bunch, but make good bird food and are quite decorative against the yellow house. And may make some fun souvenirs at Green Party events throughout the late summer and fall.
Mystery Gourd -- Either a white pumpkin-shaped squash or a classic orange pumpkin. The kid's Halloween pumpkins went into the worm bin last fall, and as the worms ate the flesh, the seeds fell into the worm castings and sprouted. I transplanted several of the mystery sprouts into the Cursed Planter and we will see what we will see. If all these die there too, I may try peanuts. The soil in the tub is quite sandy, and drains fast (which is not good for either watermelons or pumpkins) but is grand for peanuts. But how to roast them? Another project for the list.

Grapes are doing quite well on foliage and new vines, and even so signs of fruit! They must have heard me talking about this being their last year on this earth if no fruit (grin).
Over in the half-barrel by the gate the boysenberries are going great guns; the canes have not spread along the fence in the new location as hoped, but the old green canes are producing a huge crop of blossoms. We will see what the birds and passers-by leave us to eat.

Believe it or not, we're still looking for a scrap of yard to put into potatoes for fall; and I would really like to put some iceberg lettuce in for Spencer, who will not happily eat romaine or any of the other things in either a home grown or organic store bought "weed mix" salad.
Finally, we are looking at a low lying clover to replace our lawn, especially along the parking strip. Replenishes the soil, leaving it in good conditions for tilling up sections to plant in food crops, or even decorative stuff.
So much to do, so little spring!


